- test
How-to: Configure Consent Mode in Google Tag Manager
In digital marketing today, it's vital to be trusted by your audience. Google's Consent Mode is Google's way of helping you follow rules while still collecting data with their products.

What is it?
Google Consent Mode is a mechanism designed to communicate the consent choices of users on websites or mobile apps to Google. Unlike a Consent Management Platform (CMP), which directly facilitates user choices through a consent banner, Google Consent Mode handles the choices once they have been made, enabling consent settings to apply across all tags. Where previously we needed to create specific variables and triggers to manage consent, Google now streamlines the process by applying templates based on the default consent categories of CMPs.
The difference with version 1 is that version 2 of Google Consent Mode adds new parameters like ad_user_data and ad_personalisation in addition to the existing parameters.
What is the Impact?
Consent Mode V2 will be mandatory by for all platforms using Google Services (e.g. Google Analytics and Google Ads). If you are active in the EEA (European Economic Area) and don’t apply consent mode, you will no longer be able to build your audiences and use them for remarketing.
Consent Mode Set up
Prerequisites
CMP or similar solution requesting cookie consent choice per category from the user.
Clear consent category definition for each vendor tag.
Advanced vs Basic Consent Mode
With Advanced Consent Mode, you will still send hits to Google from all users, with the consent mode setting set to consent rejected. With advanced consent mode Google will model the data to fill in the gaps with aggregated data for the users that denied consent.
Check with the DPO if sending data without consent to Google is something you are allowed and willing to do as a company.
In Basic Consent Mode no data is sent if the user denies consent, Google will use a general model to fill in the gaps of data for conversions based on time of day, browser type and other type of aggregated variables/estimations.
Our recommendation is to respect users consent choices and use the Basic Consent Mode.
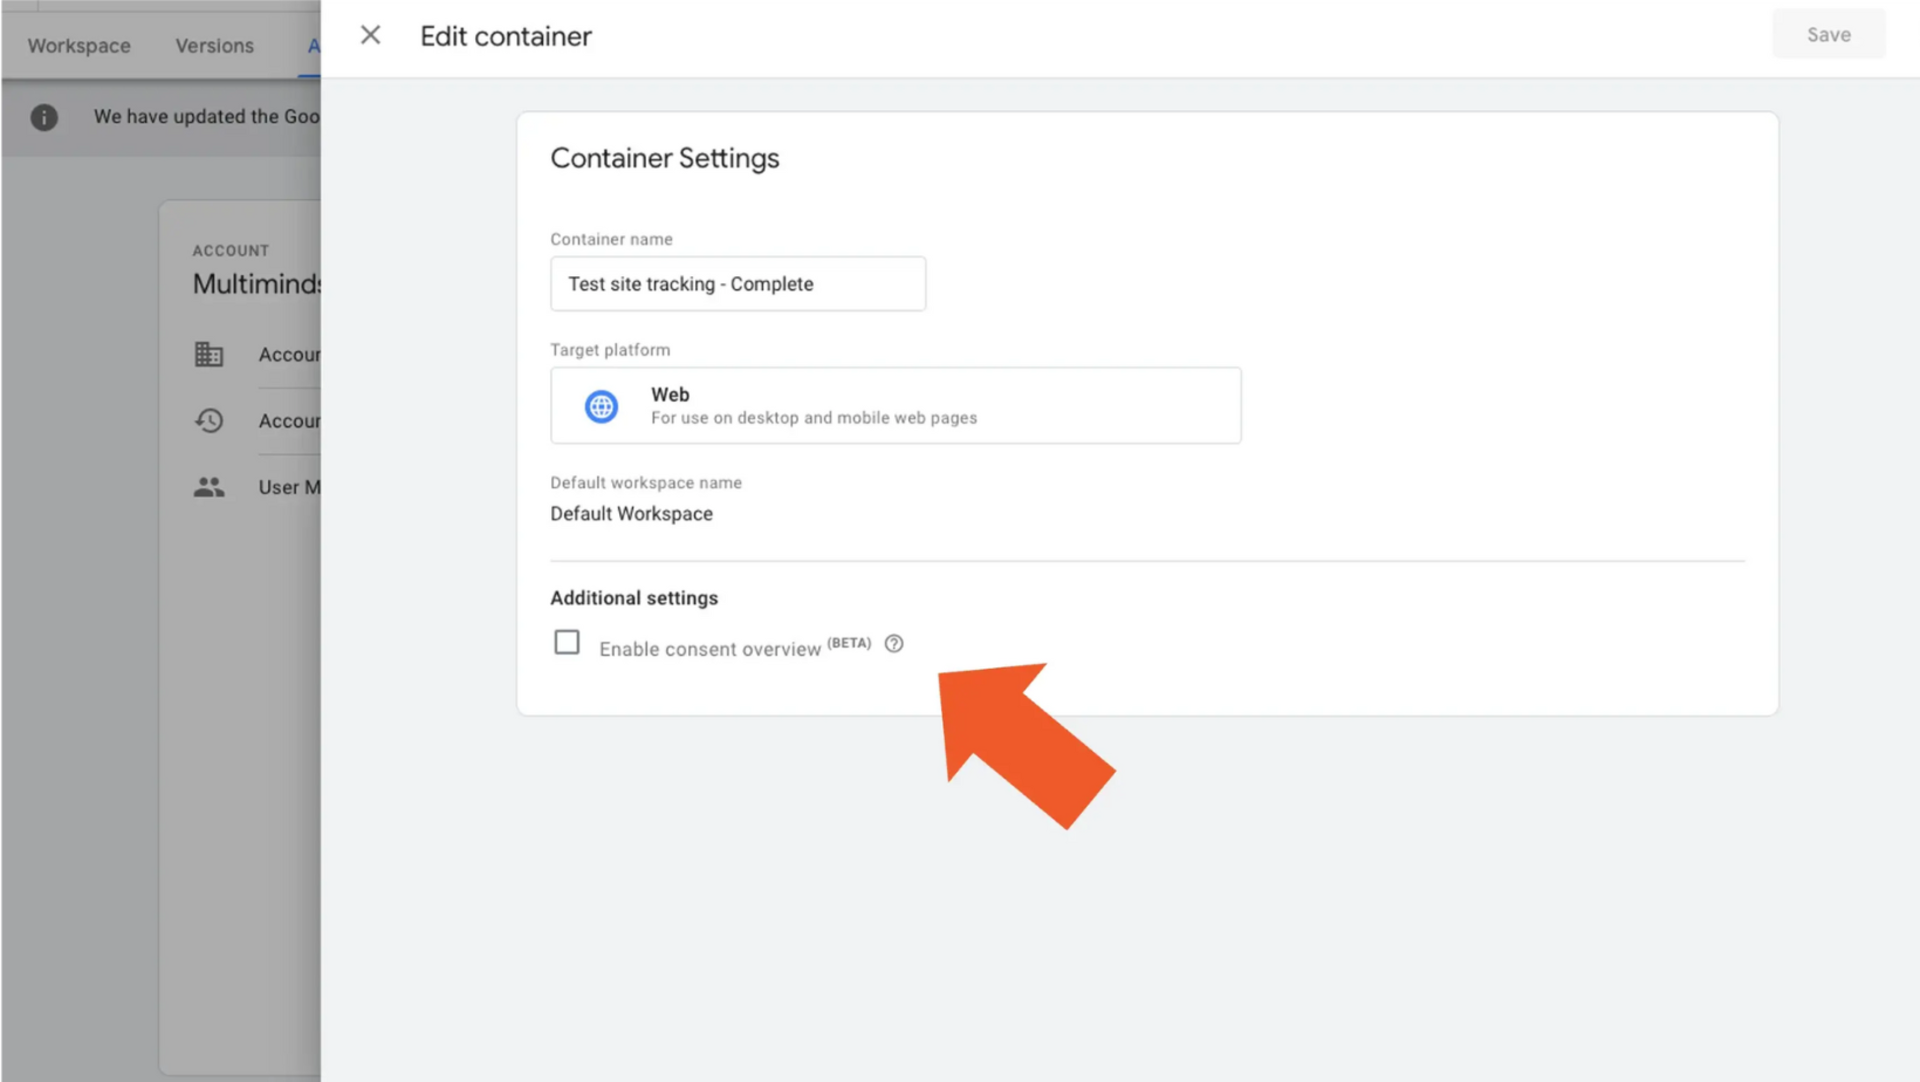
Enable Consent Overview
Enable the Consent Mode interface view in GTM.
Admin > Container Settings > Additional Settings: Enable Consent Overview
Configure the Consent Categories for Each Tag
View consent settings of tags:
Workspace > Tags > Shield Icon (top right)
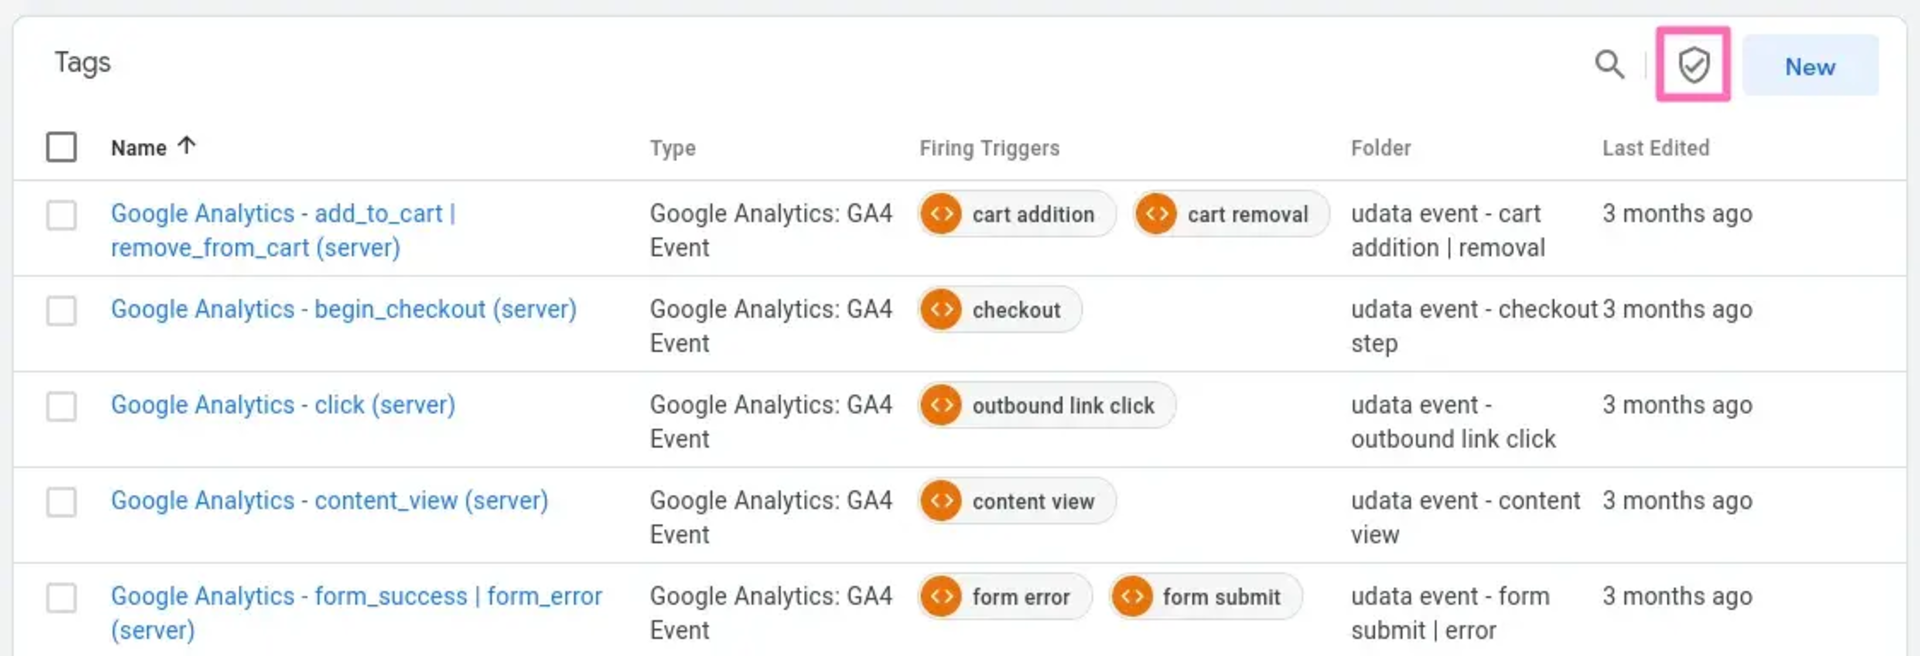
Select the tags to configure, (bulk changes are possible) and click on the Shield Icon appearing top right to open the interface.
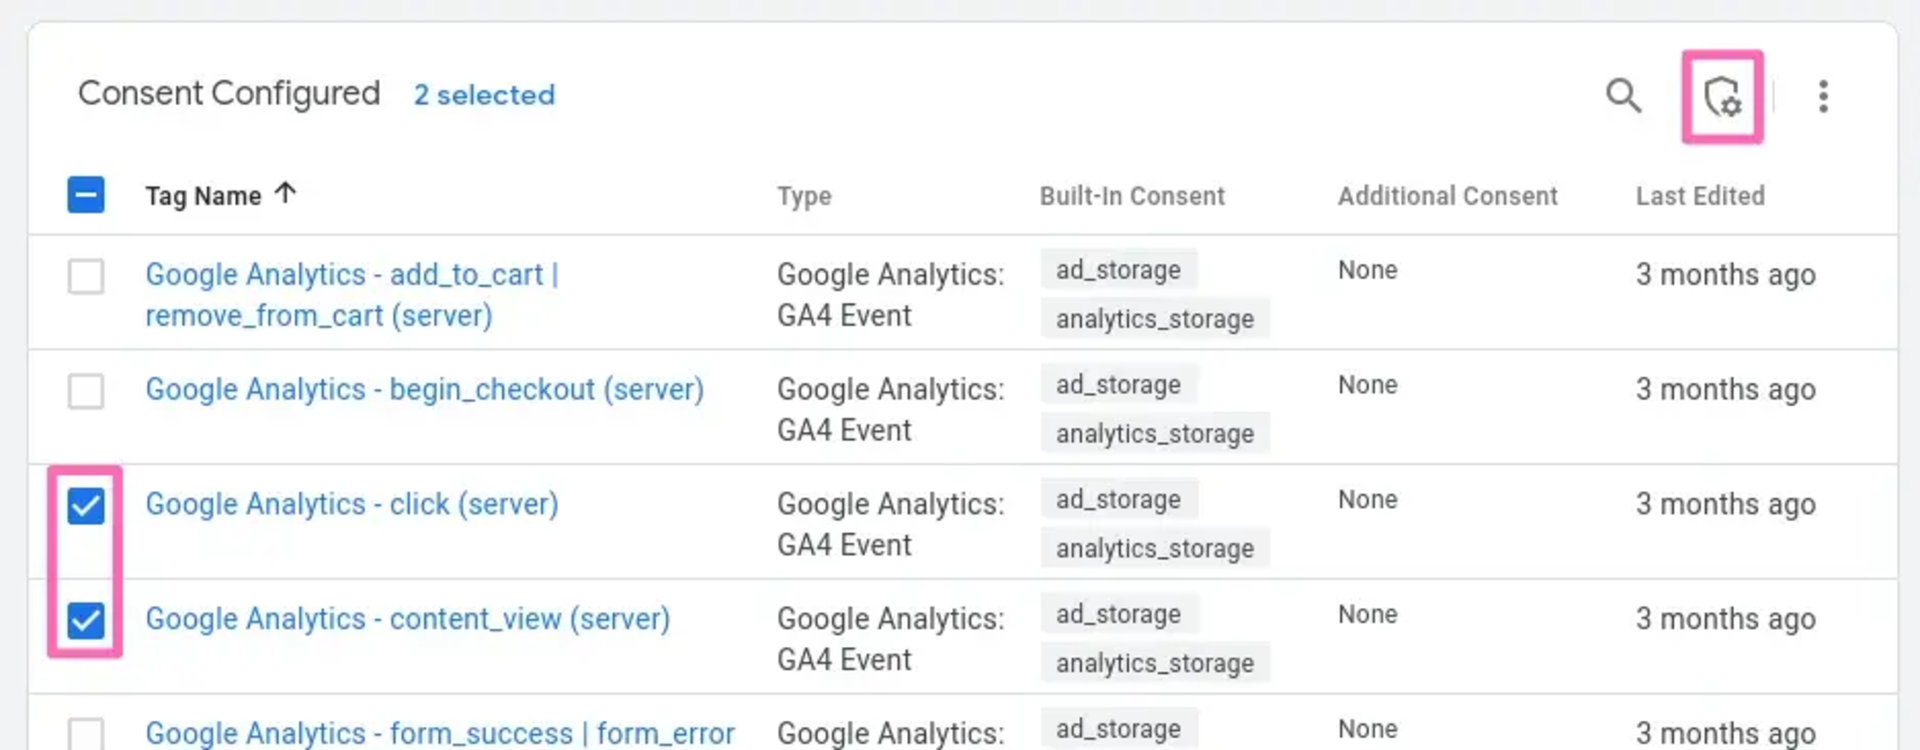
Not Set
Advanced Consent Mode, always sends data, but consent choice will be communicated to Google and hopefully respected.
No additional consent required
Build-in consent categories are sufficient and will block any data being sent if any of the categories are denied.
Require additional consent for the tag to fire
Specify additional or for tags without build-in categories what categories should be granted to send data to Google. The list below explains the different consent categories.
ad_storage:Enables storage (such as cookies) related to advertising.ad_user_data:Sets consent for sending user data related to advertising to Google.ad_personalization:Enables storage (such as cookies) related to analytics e.g. visit duration.functionality_storage:Enables storage that supports the functionality of the website or app e.g. language settings.personalization_storage:Enables storage related to personalization e.g. video recommendationssecurity_storage:Enables storage related to security such as authentication functionality, fraud prevention, and other user protection
If you have cookie consent exceptions setup on tags, make sure to remove those. Consent Mode will now be the correct way to block tags from firing if consent is denied.
If for some reason you have triggers in GTM on "Initialization" that
require consent you need to move them after "Consent Initialization"(gtm.init_consent).
gtag will keep the requests without consent until an update that grands consent and send them correctly.
CMP / Consent Banner Integration
GTM has integrations with most CMPs on the market. If you are using a lesser-known CMP or building your own banner here is how you should communicate with Consent Mode.
Add the default consent before the GTM snippet, or push it before tags are fired in GTM :
gtag('consent', 'default', {
  'ad_storage': 'denied',
  'ad_user_data': 'denied',
  'ad_personalization': 'denied',
  'analytics_storage': 'denied'
});
Once you have the users choice, push an update to gtag:
gtag('consent', 'update', {
  'ad_storage': 'granted'
});
Validation
Google Tag Manager
Preview mode of GTM will show an event called "Consent", double check that your selected consent is represented in the "Consent" tab.
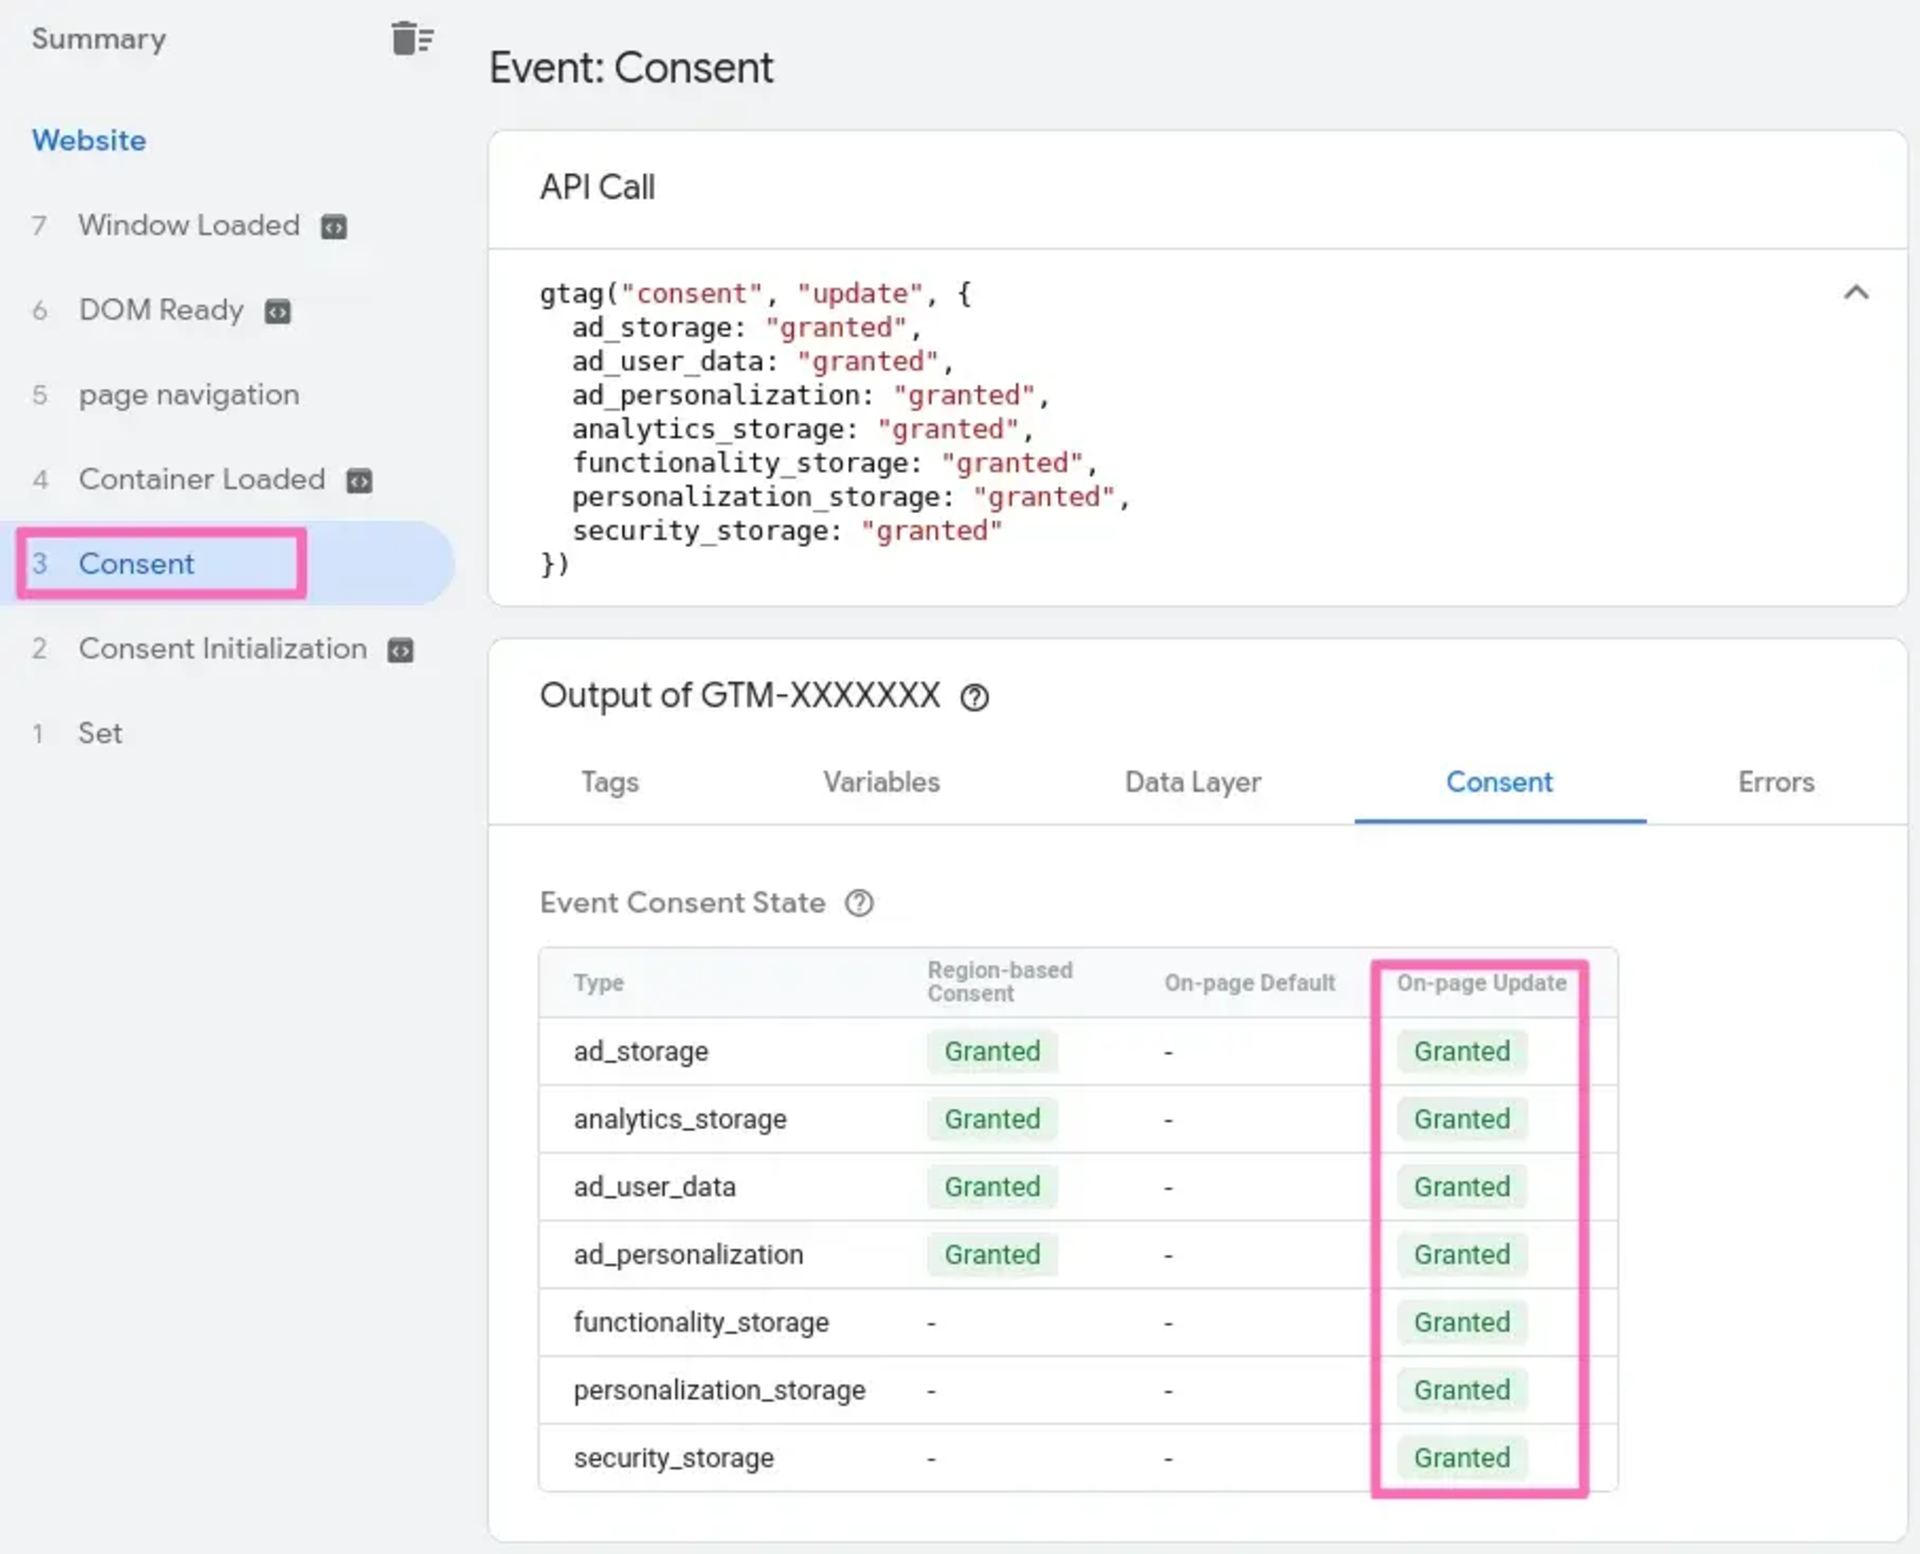
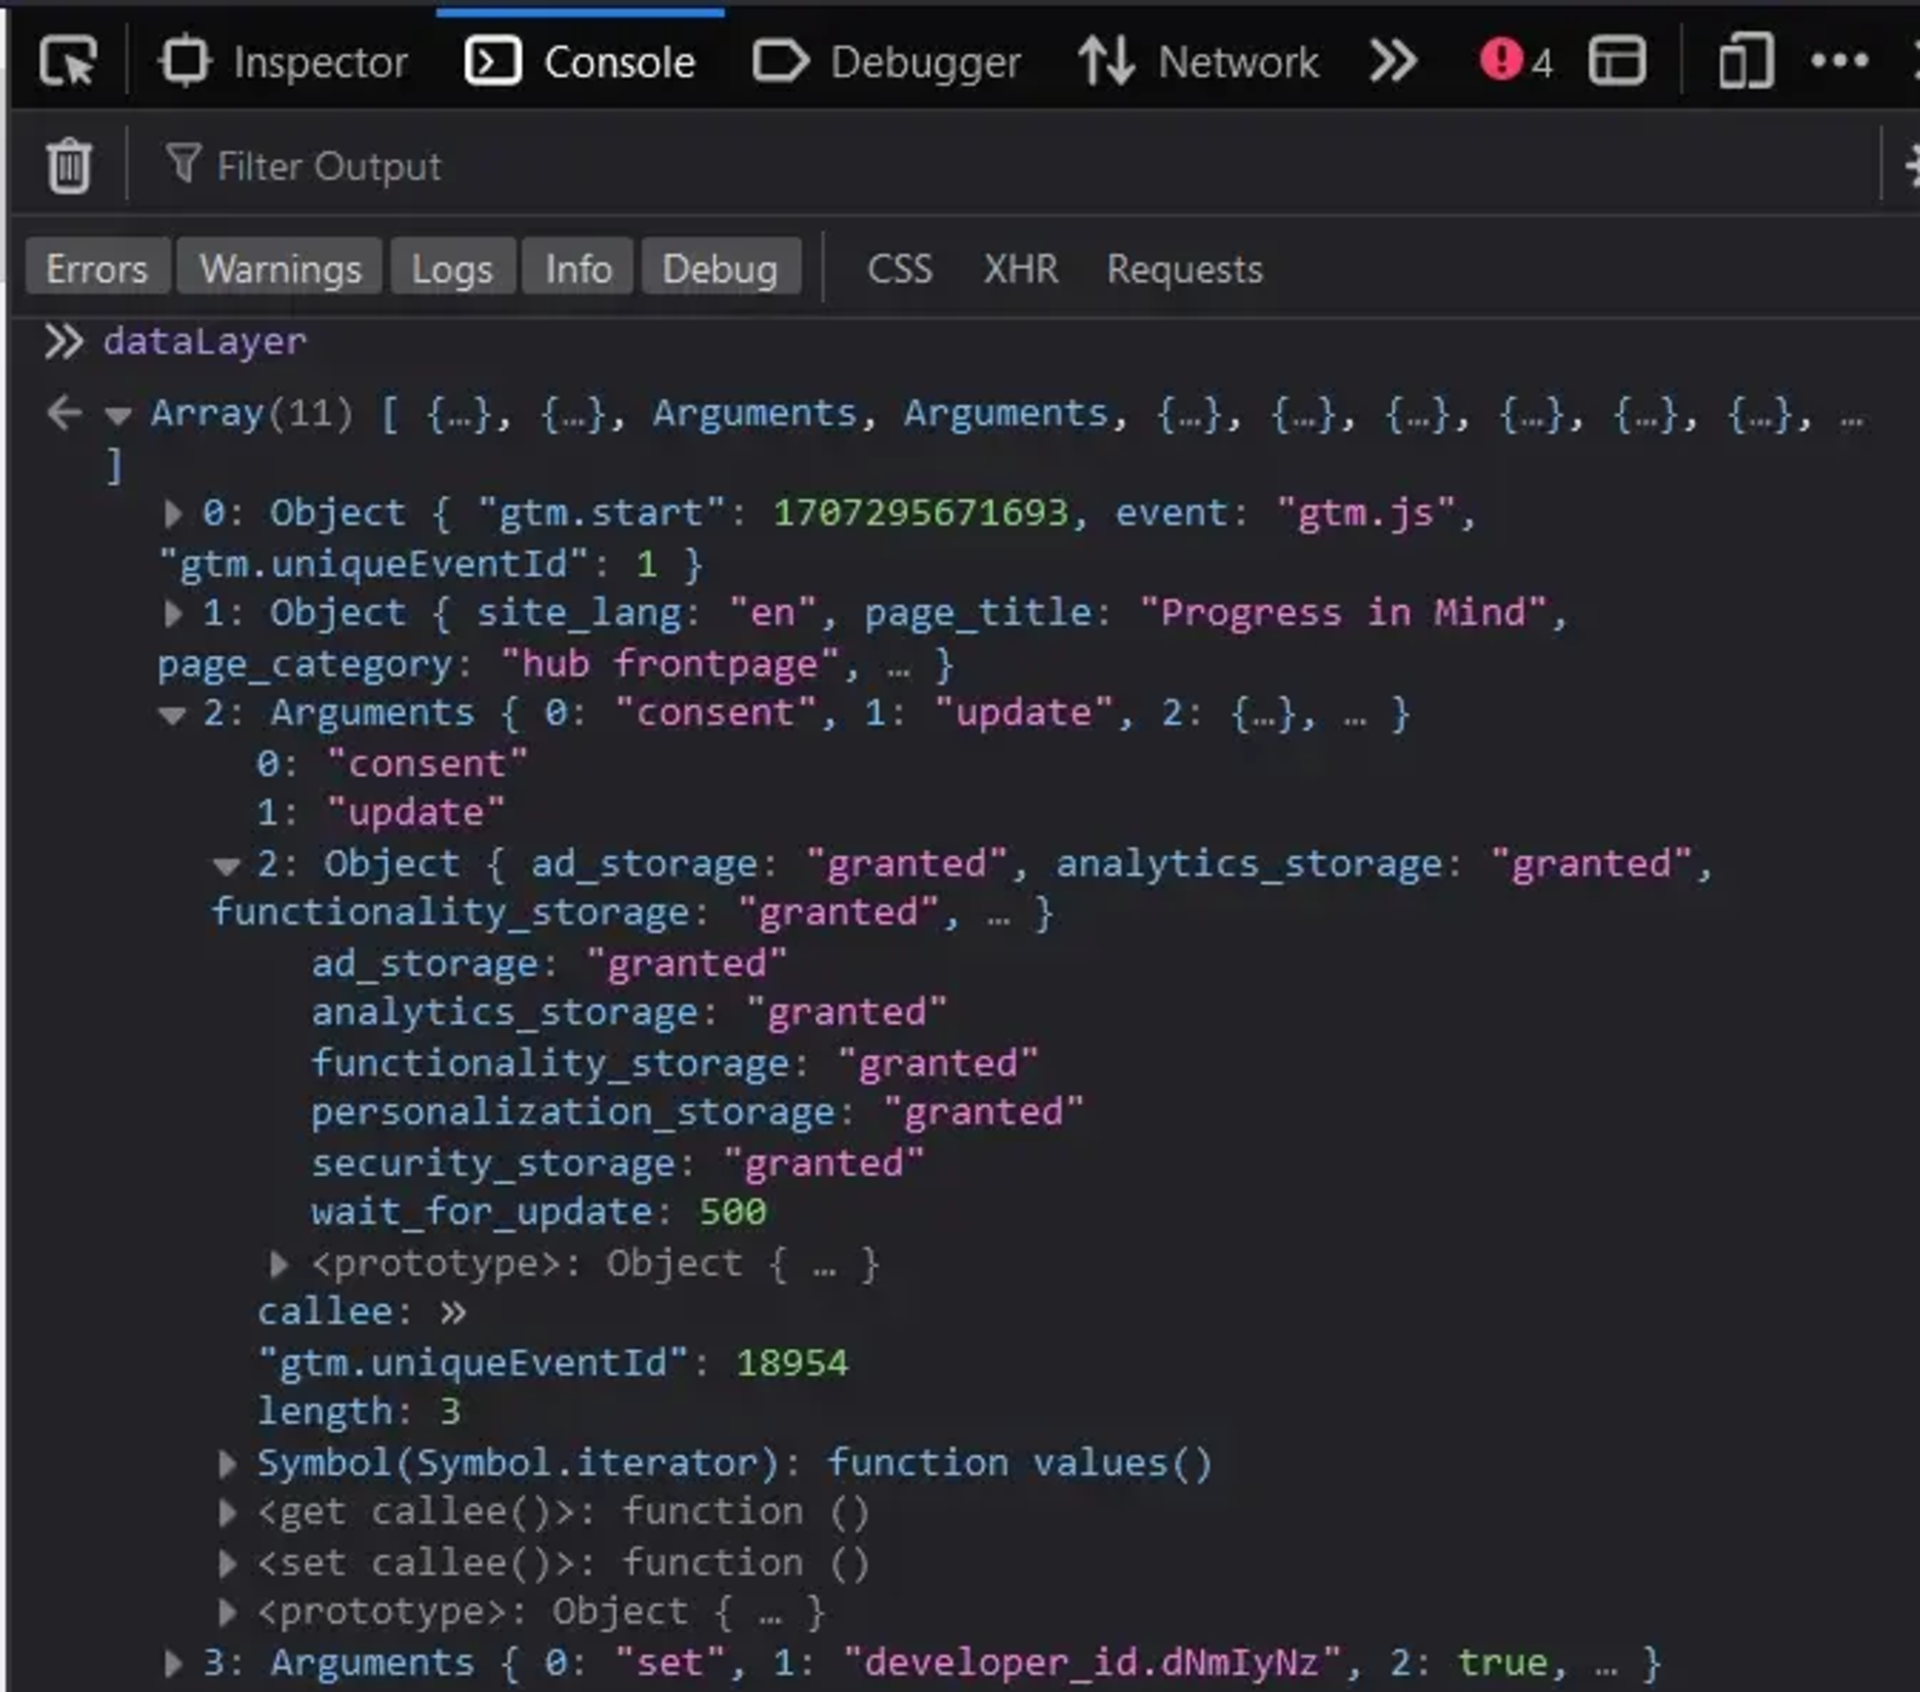
Or in the dataLayer array, it needs to contain a consent update event.
Google Analytics & Google Ads
To check if Consent Mode is propagating to Google Services correctly you can inspect the network calls in the browser's development tools. The query parameters to look for are gcs & gcd.
gsc contains the consent category summary
G100:No consent has been granted.G110:Google Ads has consent, but Google Analytics does not.G101:Google Analytics has consent, but Google Ads does not.G111:Both Google Ads and Google Analytics have consent.
gcd contains the consent per category compared to the default consent
(consent settings before the user makes a choice)&gcd=13<ad_storage>3<analytics_storage>3<ad_user_data>3<ad_personalization>5
The string starts with 1<x>, uses <x> to separate the different categories, and ends with a number like 5 (or sometimes something else) to mark the end.
l:The lowercase L means that the signal has not been set with Consent Mode.p:deniedby default (no update).q:deniedboth by default and after the update.t:grantedby default (no update).r:deniedby default andgrantedafter update.m:deniedafter update (no default).n:grantedafter update (no default).u:grantedby default anddeniedafter update.v:grantedboth by default and after update.
Conclusion
In essence, Consent Mode communicates consent that should already be implemented to Google, and in GTM it allows for a better interface to manage tag-triggering exceptions based on consent.
By using Google Consent Mode in Google Tag Manager, businesses can comply with today’s regulations and still similarly use their Google products as they are doing currently.